Wednesday, March 20, 2013

Future Food and Flowers.


I have had these lights set up for awhile now. I'm growing artichokes again this year. Mine failed last year when I tried to germinate year old seed, so this year I started all the seeds I had. I grew them the year before and managed to grow one good artichoke. The bed I had prepared and planted them in was fair too damp, we no longer use it and have seeded it over with grass mix. I also started celery and celeriac, peppers, asparagus, ground cherries, leeks, shallots and lots of petunias. I saved my own petunia seeds last year and had no problems germinating them. They're easy to look after and grow, their beautiful flowers last all summer and they are available in all kinds of varieties and colors.  When saving your own petunia seed the color the flowers end up being may be a surprise as they may not be true to the plant they came off of. A petunia surprise is never a problem, I've yet to see a color I haven't enjoyed.  I grow them for gifts, to fill in my flower beds and pots, attract beneficial insects and for my hanging baskets. They can cost enough when you buy them from the nursery and starting your own is so easy. If you already have your lights on for something else, you may as well add some petunias to the mix. Just remember to keep potting them, and all your other seedlings, up into larger pots to encourage growth and root development. I generally do the first potting up when seedlings grow their first true leaves. The artichokes are the only plants I won't have to transplant, as they do not enjoy having their roots disturbed. For that reason they are started in jiffy pots and fertilized regularly to encourage growth.  I have been using SeaBoost liquid seaweed fertilizer. The artichokes need to be exposed to a snap of cool weather, usually in May, to trick them into thinking they have gone through a winter season. This makes them produce artichokes in the same year they were started. I can almost taste the artichokes, steamed and dipped in melted butter now.  

Tuesday, March 19, 2013

In the cold frame.


I have planted some new seeds in the cold frame, and some planted in the late fall/early winter months are now germinating. This kale, spinach and bok choy were smaller going into the winter months, although they are making up for it now. After a few sunny days these have all produced new leaves and are starting to grow again. There's also mache, arugula, cilantro and swiss chard, not pictured here, that made it through the freeze and are continuing to grow again. 


Wednesday, March 13, 2013


I've been busy planting new seeds in my cold frame and indoors for moving outdoors after the risk of frost passes. Things are sprouting up in my cold frame, especially seeds I had sown in the late fall/early winter months.  I'm still sprouting seeds indoors to make sure we have some greens during these months. Here's mung bean sprouts in the jar and broccoli seed sprouts in the soil tray, two of my favorites for sprouting indoors. So tasty! 

Thursday, February 28, 2013

Soaking Nuts, Seeds, Grains and Legumes.


Soak your nuts, seeds, grains and legumes to improve digestibility! I've talked about this several times on my blog before, but here's a quick review. Soaking these items starts the sprouting process and reduces phytic acids, neutralizes enzyme inhibitors and encourages beneficial enzymes. Phytates bind to certain minerals in our intestinal tract and block our absorption of these minerals. Generally speaking all nuts and seeds can be soaked 6 hours to, preferably, overnight in a solution of sea salt and warm water. A small amount of lemon juice or apple cider vinegar can also be added to the mix. Rice and other grains can be prepared the same way. Whey can also be added to the solution to ferment the seeds, nuts or grain which can then be dehydrated for future use. Soaking nuts and seeds also increases, in my opinion, they're tastiness! To keep things simple I always keep a jar of random soaked nuts and seeds, for quick use. I don't dehydrate mine, I simply drain them well, pat them dry and keep them in the fridge to use with a few days for smoothies, salads, stir-fries etc...I tend to keep my consumption of grains to a minimal, however when I cook grains, I soak them overnight. It may take a little organization, although it's worth it to get the most nutrition out of your food.

Tuesday, February 19, 2013


Starting some seeds indoors to keep me occupied while waiting for these beauties to emerge. I planted some snowdrops this fall, so they may be the first to greet me. This crocus display was up just in time for Easter of last year. 


Glory of the snow, another early bloomer. 


Delicate iris reticulata. 


One of the first daffodils. 


Hycainths. 

Friday, February 8, 2013

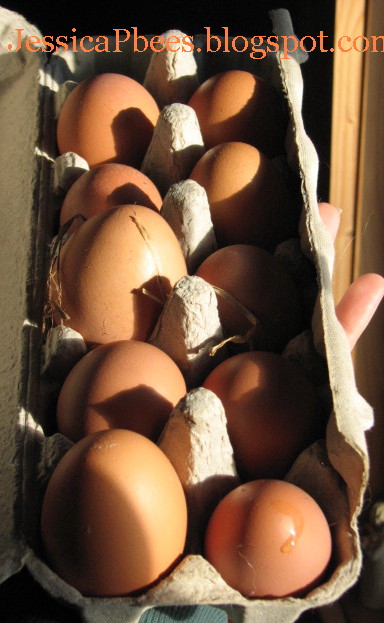
Eggs.


Our hens have slowed down on laying a little bit, we don't use a light to stimulate them, just as our new hens have started laying. The result being a bit of a unpredictable laying pattern. Our oldest hens are now over two years old, although most of them are not showing much signs of retiring. We're still getting enough eggs that I only had to buy two cartons from the store, and I'm hoping they will be the only ones. I would almost rather do without eggs than buy them from the store, if boiled eggs were not my favorite breakfast I probably could. 
Now here is a bit of a fun fact about eggs. If you have your own hens, I'm sure by now you've tried to boil a fresh egg. If you do not have your own hens, I'm sure you've boiled eggs from the store before. You know how nice and easy it is to peel a store egg? Would you believe me if I said peeling a fresh egg is next to impossible? The egg in fresh eggs clings so tightly to the egg shell that you lose most of the egg while attempting to peel it, not to mention you end up with a big mess that may make you want to pull your hair out. So how can you get your farm fresh eggs to peel as nicely as their store bought peers? You put them in a carton, mark them for boiling and push them into the back corners of the fridge for a week or more. After about a week, your farm fresh eggs will be as easy to peel as store bought. 

Friday, February 1, 2013

Fresh from the Oven.


A loaf of sourdough. There is no commercial yeast added to this bread what-so-ever! It rises with help from Mother Nature.  If you'e interested in sourdough baking, here's a link to an old blog post to get your started.